Every control in the correction editor
Most patterns need none of this. These are the tools for the occasional page that needs a nudge — what each button does and when to reach for it.
 1
2
3
4
5
6
7
8
9
10
- 1+ Add box — draw a new piece selection the auto-trace missed entirely.
- 2+ Negative — mask a stray mark (arrow, handwriting, smudge) so it's never traced. See below.
- ⊞Join pages (next to + Hole) — put a piece printed across several pages back together. See below.
- ◯+ Hole (next to + Negative) — cut an opening out of a piece: the middle of a ring, a window. See below.
- 3Save edits — stores your corrections without re-tracing. Fast; use it while you work through a page.
- 4Download — applies any unsaved edits first (re-cutting only if something actually changed), then opens the download dialog.
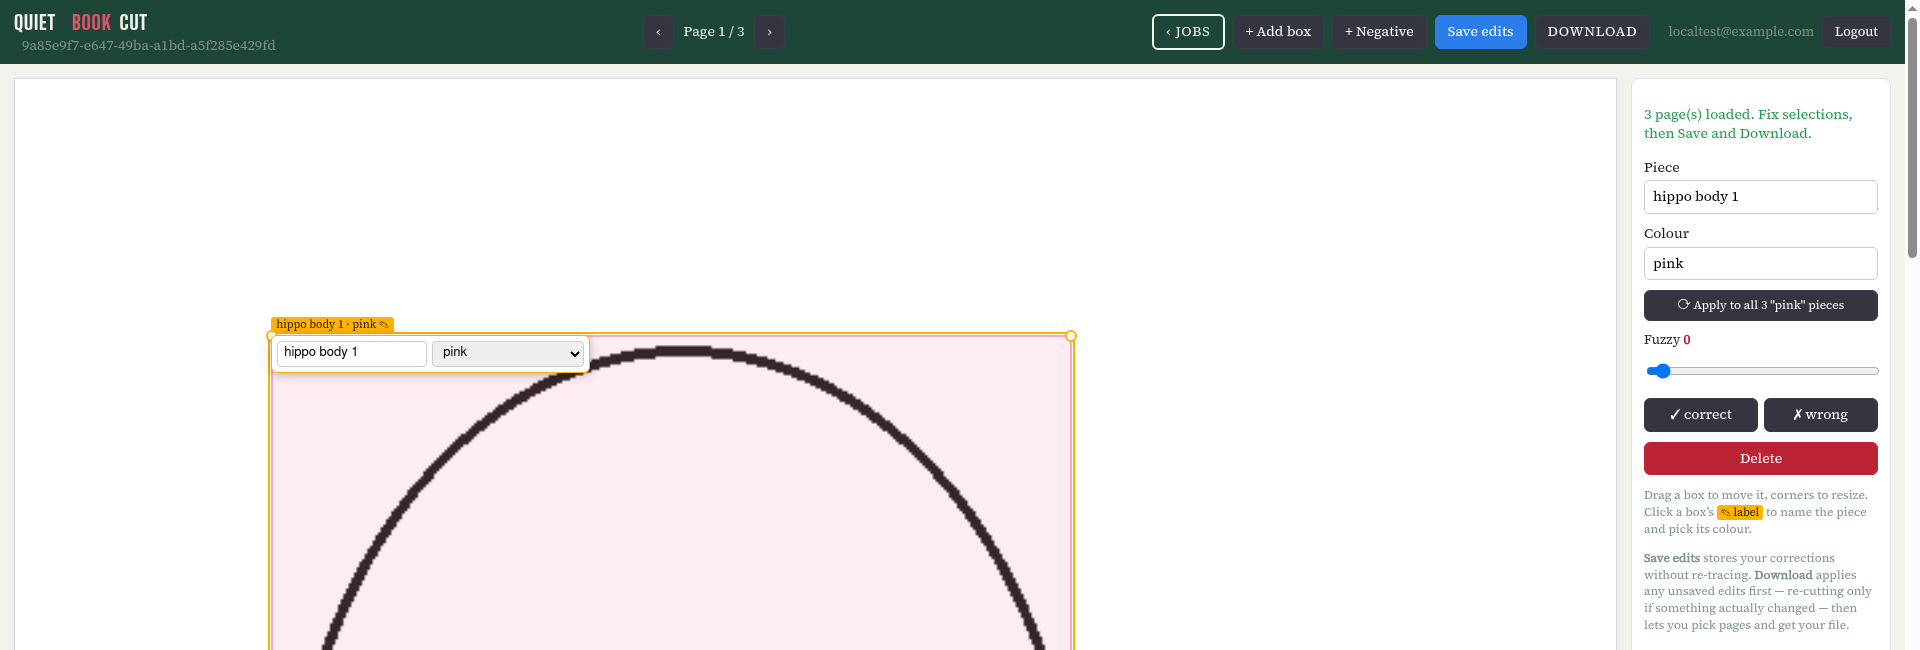
- 5Piece — the name for this piece. Click a box's ✎ label on the canvas for a quick inline version of the same field.
- 6Color — type to match an existing color in this job, or add a new one. Driven by what the handwriting note said originally.
- 7Apply to all … pieces — recolor every piece currently sharing this color, across every page, in one click. See below.
- 8Fuzzy — bridges small gaps in a hand-drawn outline. See below.
- 9✓ correct / ✗ wrong — tags a piece the validator flagged as uncertain. Marking it "wrong" excludes it from downloads; "correct" confirms it's fine as-is.
- 10Delete — removes this box entirely. Doesn't touch the fabric estimate or billing — a deleted piece was never unlocked.
Red boxes: what needs checking
On your Jobs list, a finished pattern shows how many pieces it found and, if any, “N to check”. Hover over (or tab to) that link to see each one by page. In the editor they are the boxes with a red border instead of a traced outline. There are two kinds:
- Not traced — the piece was found and named, but its outline wouldn't close into a shape. Usually a gap in the line, a dashed edge, or very faint pencil. Try Fuzzy first. If a stray mark is joined onto the outline, put a Negative box over the mark.
- A shape with no name or colour — the checker found ink that looks like a piece but nobody labelled it. If it is a piece, type its Piece name and Color and it will be cut. If it isn't (a picture, a diagram, a logo), mark it ✗ wrong or delete the box.
Red boxes are never cut or charged, so leaving one alone is safe. You just won't get that piece in your files.
🧵 Negative boxes
Draw a box over ink that shouldn't be part of any piece — a stray arrow, a handwritten note sitting too close to an outline, a smudge. Click + Negative, then drag a box over the mark.
A negative box masks the ink before re-tracing — it doesn't just cut a box-shaped chunk out of the finished piece. That matters: drawing a negative box over, say, a letter's closed loop that got mistaken for a cut-out hole genuinely removes the hole, rather than leaving a box-shaped notch behind. Affects every piece the box overlaps, not just the one you were looking at when you drew it.
Worked example. Both pieces below had stray ink traced right into them — a loop baked into what should be a plain rectangle, and a hand-drawn arrow baked into an orange piece.
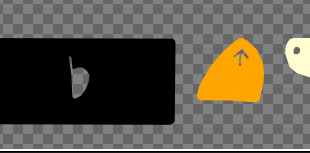
Before — stray ink traced right into the piece
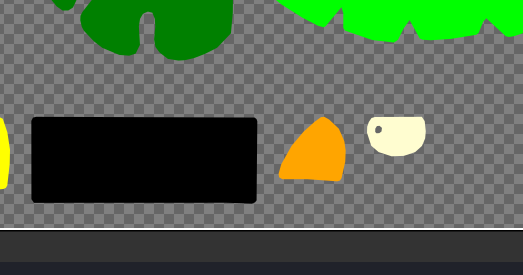
After — negative boxes masked both marks before re-tracing
How to draw the box: start the drag on a blank part of the page — empty background, not on top of an existing piece's box. Starting on top of an existing box just moves that box around instead of creating a new negative region. A reliable order: click + Negative, start your drag somewhere clearly empty (the right-hand margin works well), then drag the box over onto the stray mark and resize it from there until it fully covers the ink you want gone.
◯ Hole boxes: cut out the middle
Some pieces have an opening: a ring like a snail shell, a picture frame, a donut, a window in a house. They are drawn as one outline inside another, and on its own the tracer can't tell that the middle should be cut away, so the piece comes out solid.
To open it, click + Hole and drag a box snugly around the inner outline, then click Download (it re-cuts first). The shape inside that outline is cut out of the piece around it. Use one hole box per opening.
- The box doesn't need to be exact — the inner drawn line is found inside it, even faint pencil.
- A hole box isn't a piece: it is never cut or charged on its own, and it never changes a piece it isn't inside.
- Holes stay through every re-cut and show up in the downloads and in Preview pattern.
- To make the piece solid again, select the hole box and click Delete.
Don't use an AI note or an extra + Add box for this: a note only describes the piece for the AI photo, and a second piece box inside the first stays a red “not traced” box.
Join pages: a piece printed across several pages
Big pieces are often printed over two or four pages (“page 1 of 4”, with arrows or letters to line them up). No single page has the whole outline, so the piece shows as a red “not traced” box on each page.
- Click Join pages.
- Tick the piece's pages in reading order: left to right, then the next row. The number on each tick shows its place.
- Set Pages across (2 for a 2×2 layout).
- Click Snap together: the pages are lined up where their printing and alignment arrows meet, or, for pages meant to overlap ("overlap the words"), where the printing they share lies on top of itself. Zoom in to check the joins. If one is off, drag that page (the pages are drawn over each other, so you see both sets of lines), or click it and nudge it with the arrow keys (Shift for bigger steps).
- Click Join and trace. A new page is added with the whole piece on it, and it is traced straight away.
The piece's parts on the original pages are switched off, so it is only cut once. If the outline still doesn't close where two pages meet, line them up a little closer (undo and join again), or turn up Fuzzy on the joined piece.
To start over, go to the joined page and click Undo join: the page is removed and everything on the original pages is switched back on. If you joined several times, undo the newest join first.
Material and AI note
Under the color you'll find two more fields for the selected piece.
Material — what you'll make the piece from: felt, fleece, faux leather, ribbon, a button and so on (the same list as the page designer). It sets the texture in Preview pattern, tells the AI photo what to draw, and shows up in your materials list. If the pattern's handwriting named something that isn't on the list, you'll see it as “read from the pattern” until you pick one.
AI note — a short note (up to 200 characters) about what the piece is or does, like “a flap that lifts up to show the mouse”. Only the AI photo in Preview pattern uses it, to draw the piece more like the real thing. Keep it friendly — notes with rude words can't be saved. The note never changes the shape that is cut: writing “cut out the middle” here won't make a hole — use a hole box.
Changing either one never changes what you've paid for: an unlocked piece stays unlocked. A changed piece does get a fresh AI photo the next time you ask for one.
Preview only
Some things on a pattern aren't cut from felt but still matter for how the page looks: a zipper mouth, a bell nose, a pompom sewn onto a hat. To show one in your preview, draw a box around it with + Add box, name it, pick its color and Material (Zip, Bell, Button…), add an AI note if you like, and tick Preview only.
A preview-only box:
- is never cut — it isn't in any download (SVG, DXF or printable PDF) and is never charged;
- shows with a dotted border and “preview only” on its label here in the editor;
- is drawn in Preview pattern over the piece it sits on, numbered and listed under the page as “(material, preview only)”;
- is included in the Photo-realistic view of the piece it sits on, so the AI draws the zipper on the hood. Adding or changing one makes a fresh photo next time.
Untick it to turn the box back into a normal piece that gets cut.
Fuzzy slider
Fuzzy closes small gaps in a piece's outline before it is traced, so a line that doesn't quite meet itself still becomes a solid piece. 0 is off; 10 closes gaps of about 3 mm.
Use it when a piece shows a red “not traced” box, or its cut shape comes out as a thin ring, a sliver, or only part of the piece. Typical causes:
- the pen lifted and the outline has a gap;
- one edge is drawn as a dashed line (a fold or seam edge);
- the outline is faint pencil or a light scan;
- a phone photo where parts of the line faded out.
How: select the piece, set Fuzzy to 4, then click Download (it re-cuts the pattern first when something changed) and look at the outline. Still open? Try 7, then 10. Use the lowest number that works — a high number can also close gaps that were meant to be there, joining a piece to a neighbour that touches it or filling in a sharp notch.
Good to know:
- Fuzzy works on one piece at a time; other pieces are not changed.
- The tracer already tries some Fuzzy by itself on any piece that won't close. A red box means even that wasn't enough, so start at 4 or more.
- Phone photos get Fuzzy 3 on every piece automatically. You can change it per piece.
- Fuzzy can't invent a missing edge. If a whole side of the piece isn't drawn, it can't be closed: fix the drawing and upload it again.
- Fuzzy doesn't change what you pay: an unlocked piece stays unlocked.
↻ Apply to all … pieces
Fixing one piece's color (a misread "light blue" that should've been "medium blue", say) often means the same mistake repeats across the whole pattern. This button finds every piece currently sharing the original color you selected and recolors all of them to the new one, across every page — one click instead of hunting down each one by hand.
- Edits are per-job. Nothing here touches other jobs, even ones with identical pieces.
- Save edits often. It's instant (no re-trace) — there's no reason to wait until a whole page is perfect before saving.
- Download re-traces only if needed. If nothing changed since your last download, it skips straight to the file.