How it works
- Upload a papercraft template: a PDF, or a picture of one (JPEG, PNG or WebP).
- Check each page: every piece is numbered, with its cut lines, folds, slits and openings shown.
- Leave out any piece you don't want to cut.
- Choose one score layer or mountain and valley folds apart, pen numbers, and SVG or DXF.
- Download one zip with a cut file per page, ready for Cricut Design Space, Silhouette Studio or Brother CanvasWorkspace.
Pictures are sized as 300 DPI scans. A phone photo of a printed sheet may not come out at its true size, and fold direction can't be read from a picture, so its folds go in one score layer.
Step by step in Cricut Design Space
One page (yellow-page-02.svg, with mountain and valley folds and pen
numbers) from upload to the mat preview. Every click is marked with a numbered circle.
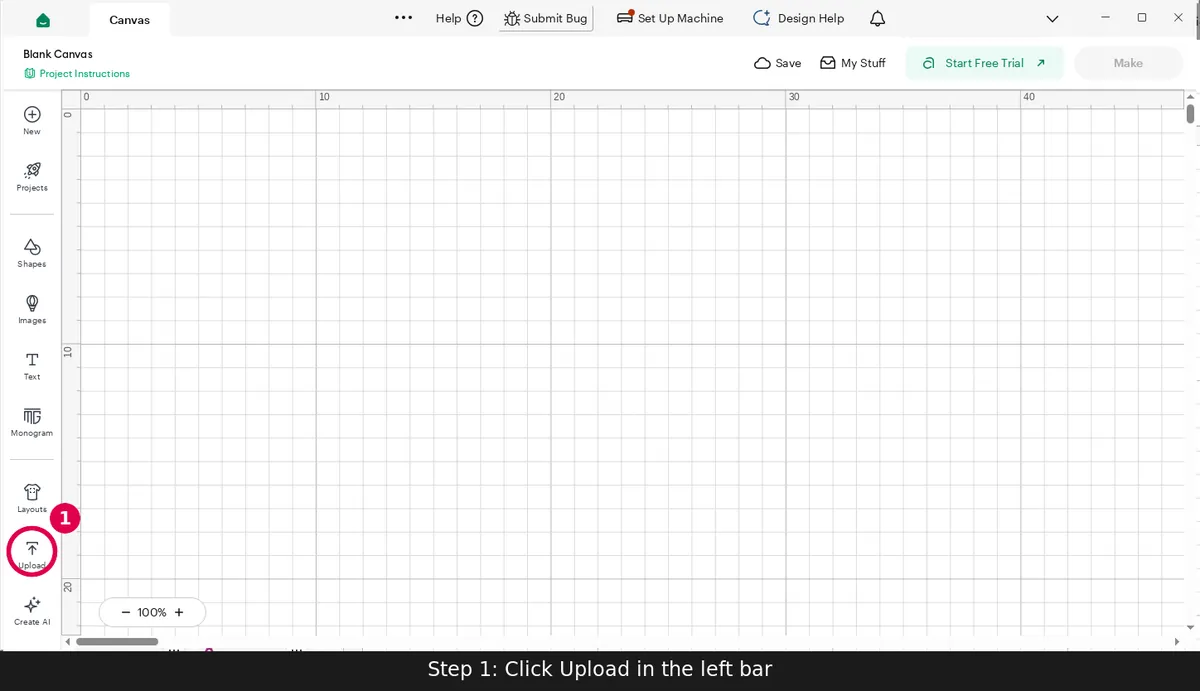
Click Upload in the left bar 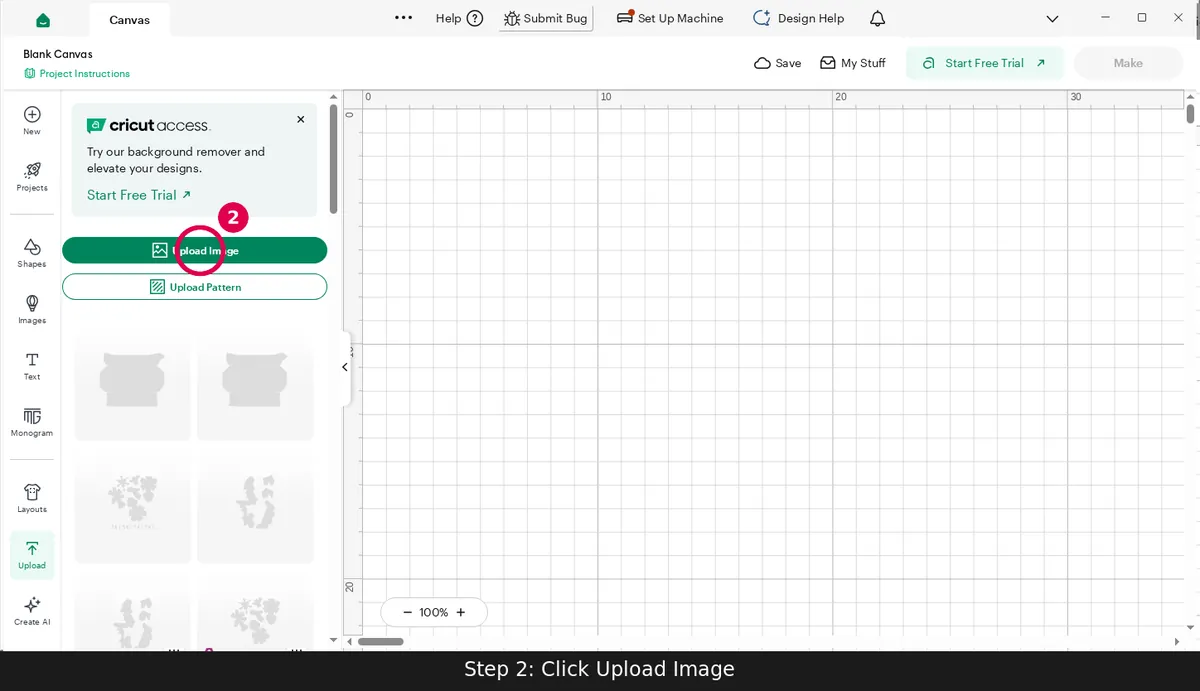
Click Upload Image 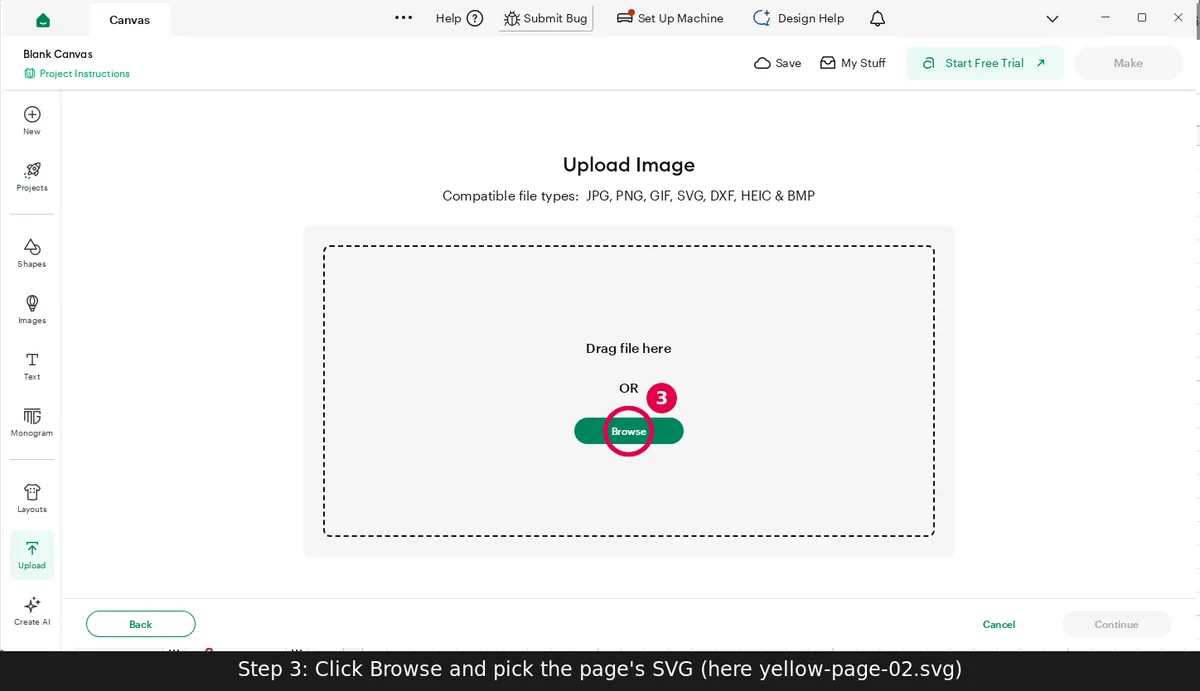
Click Browse and pick the page's SVG (here yellow-page-02.svg) 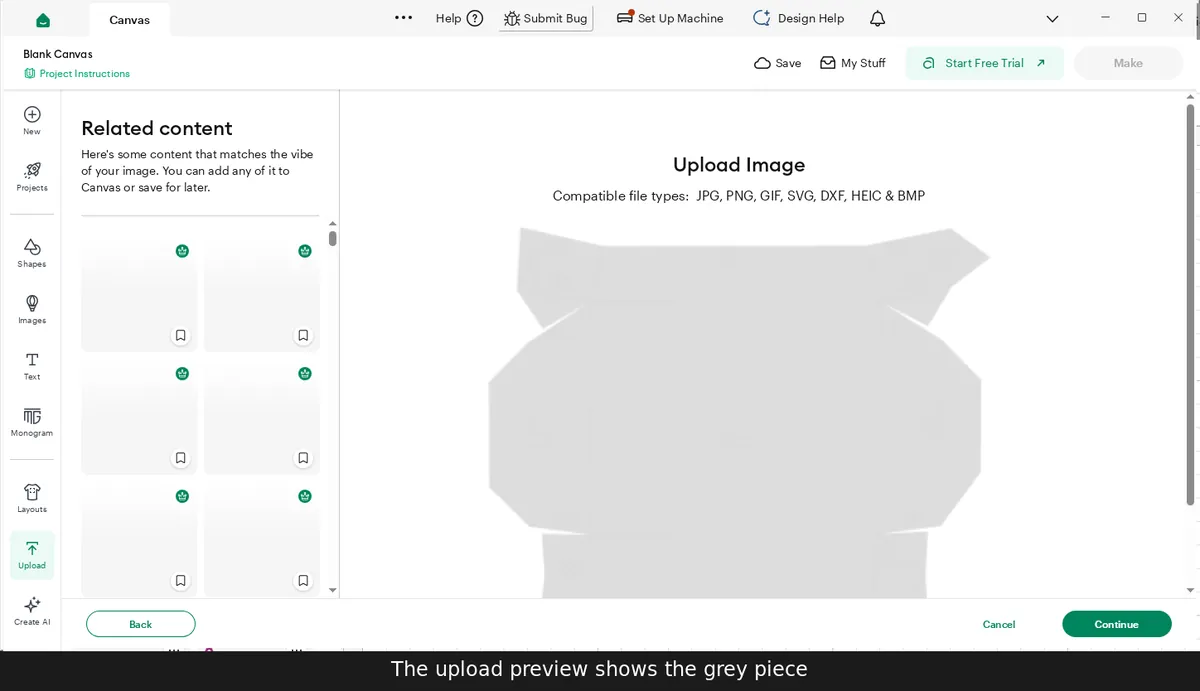
The upload preview shows the grey piece 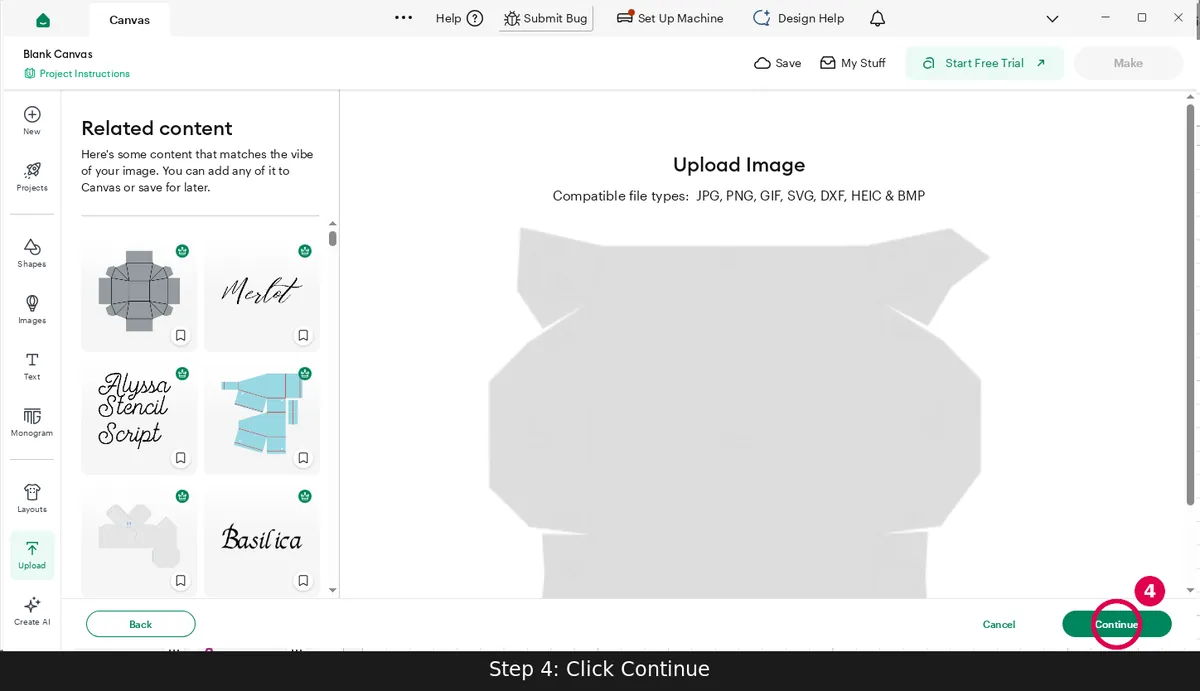
Click Continue 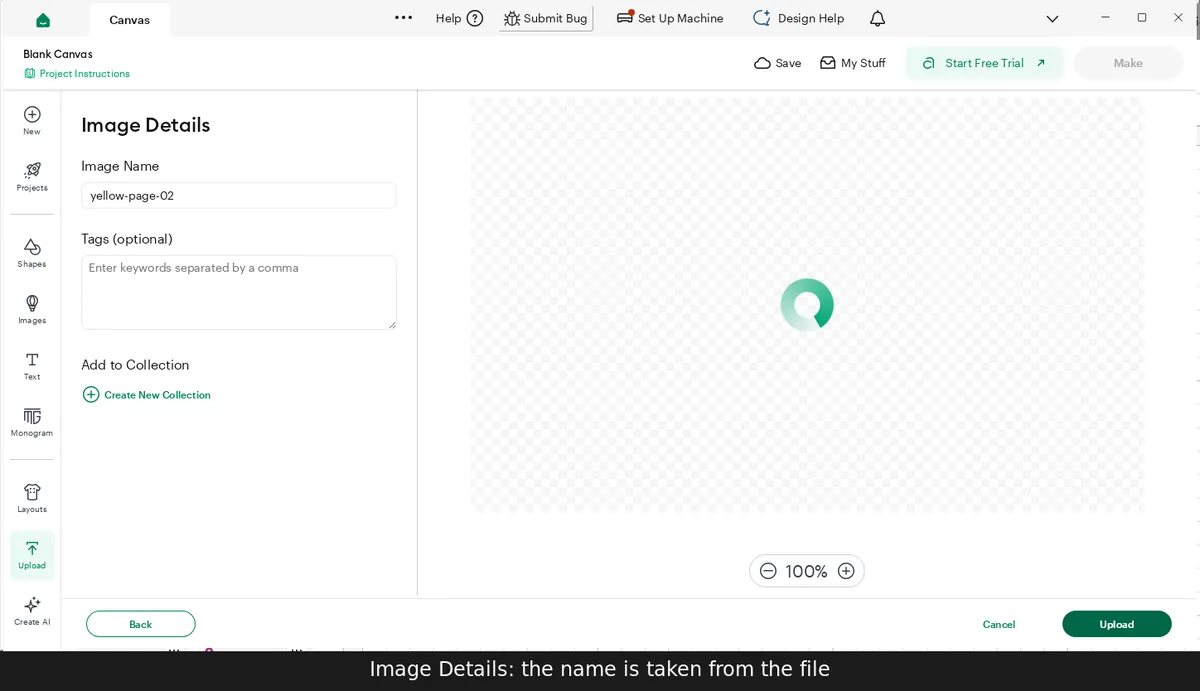
Image Details: the name is taken from the file 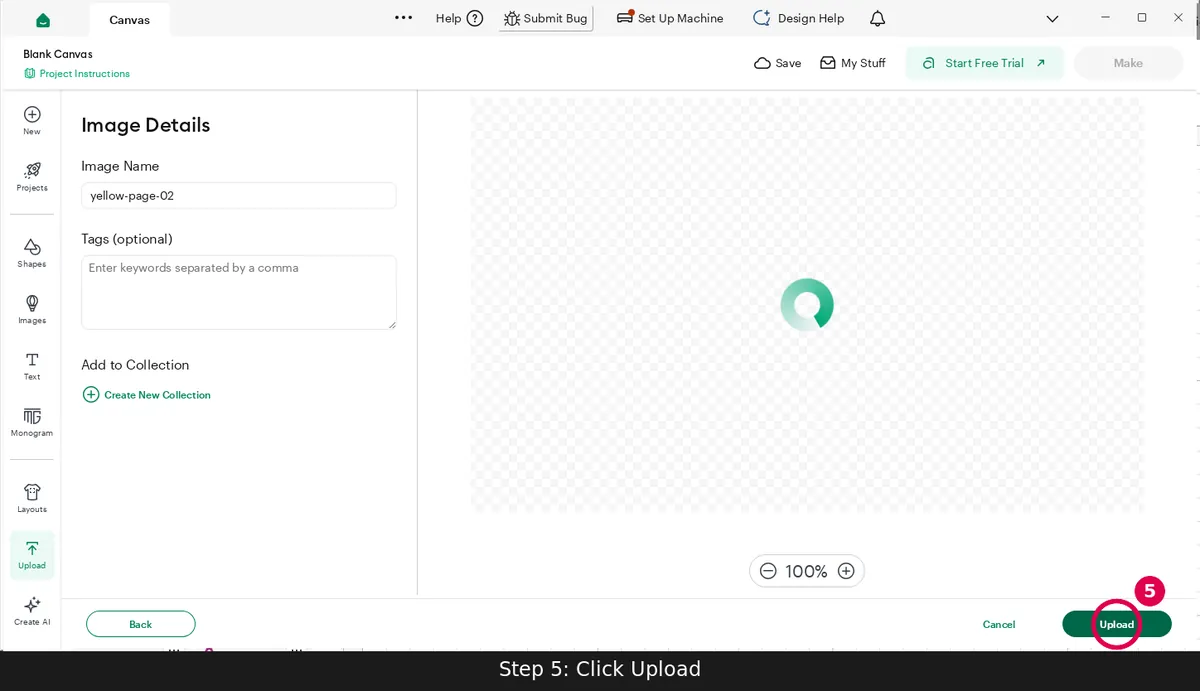
Click Upload 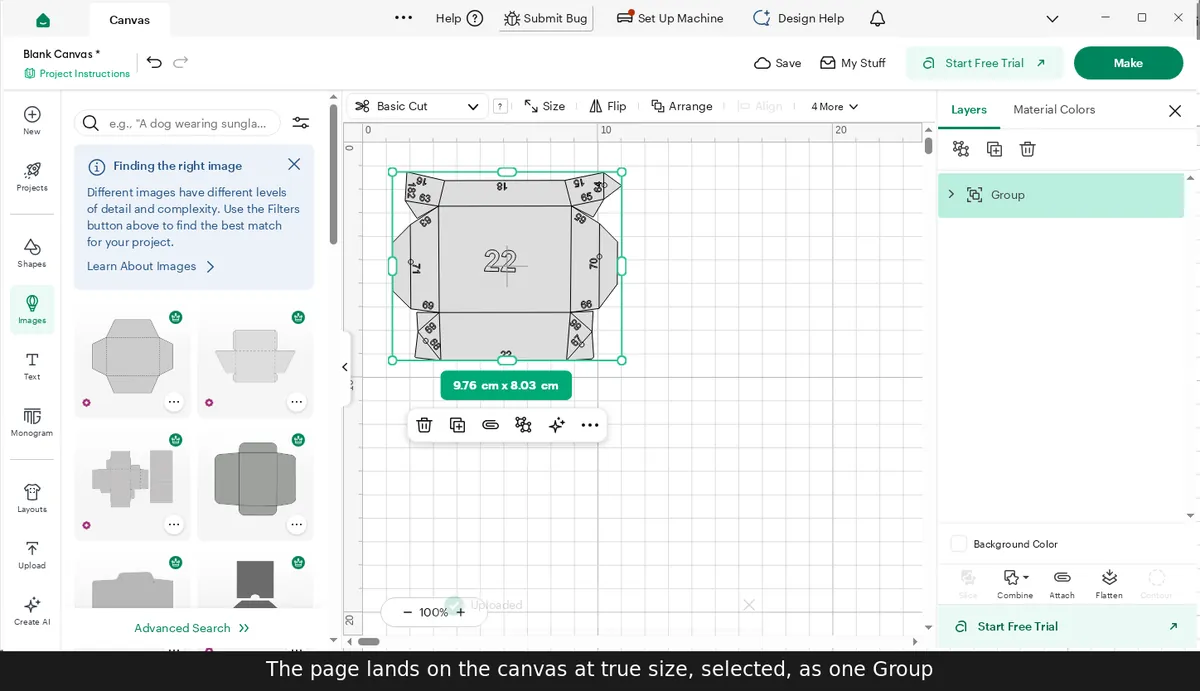
The page lands on the canvas at true size, selected, as one Group 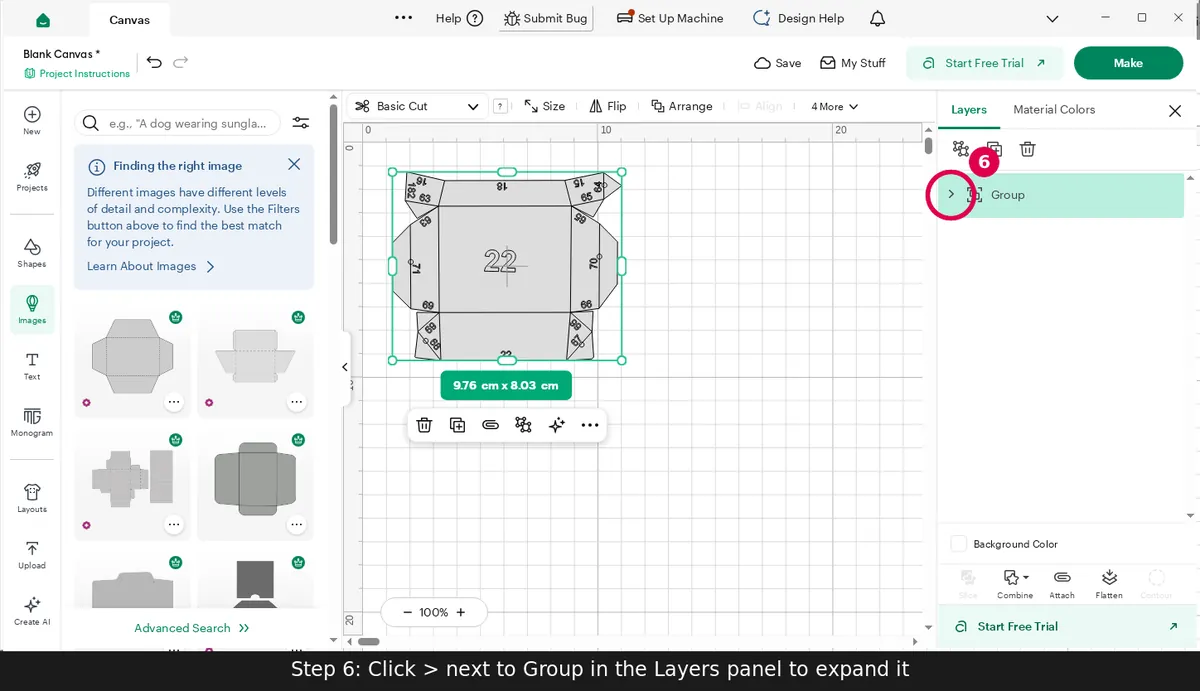
Click > next to Group in the Layers panel to expand it 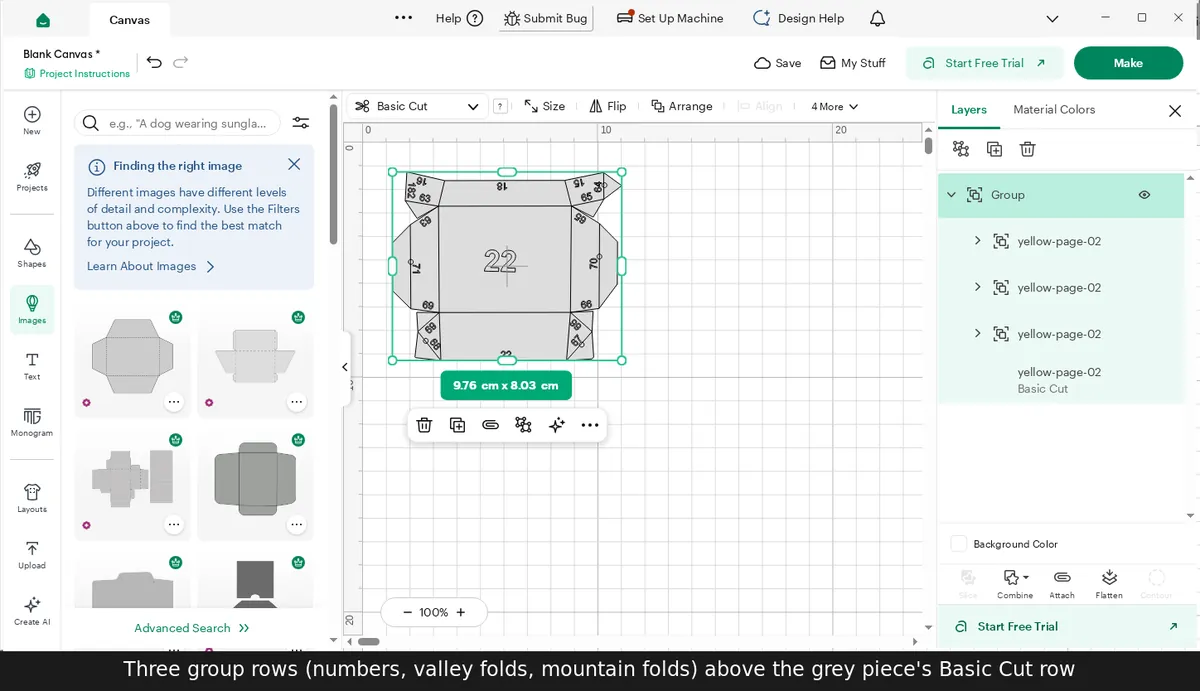
Three group rows (numbers, valley folds, mountain folds) above the grey piece's Basic Cut row 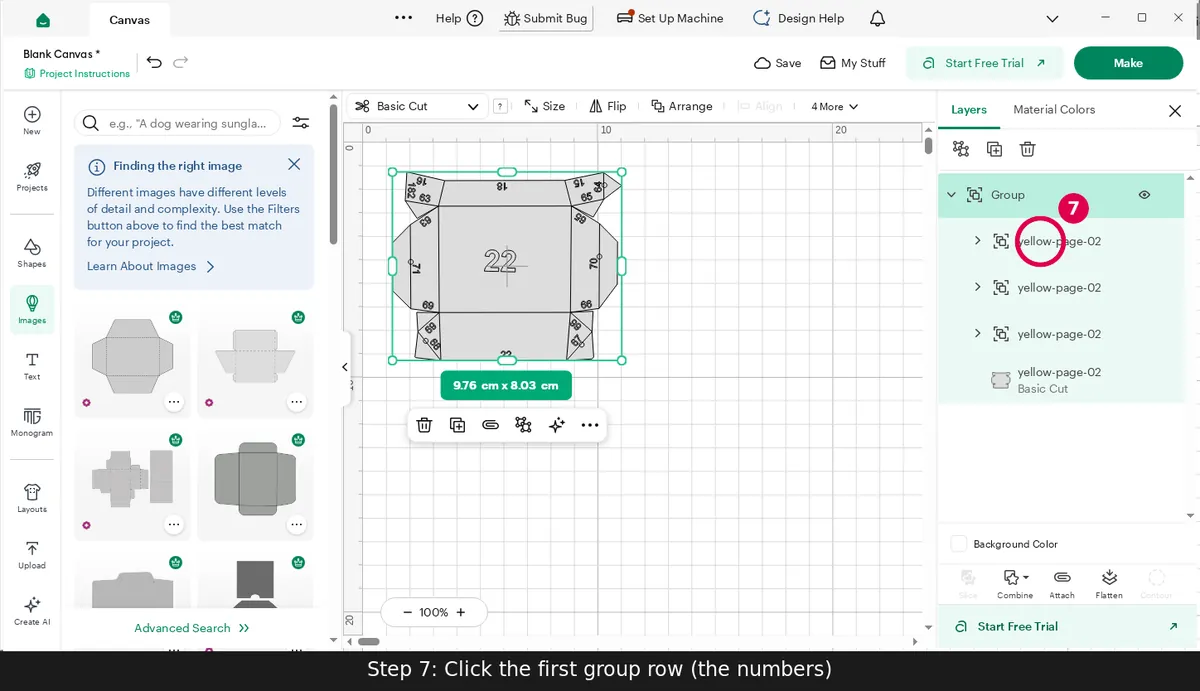
Click the first group row (the numbers) 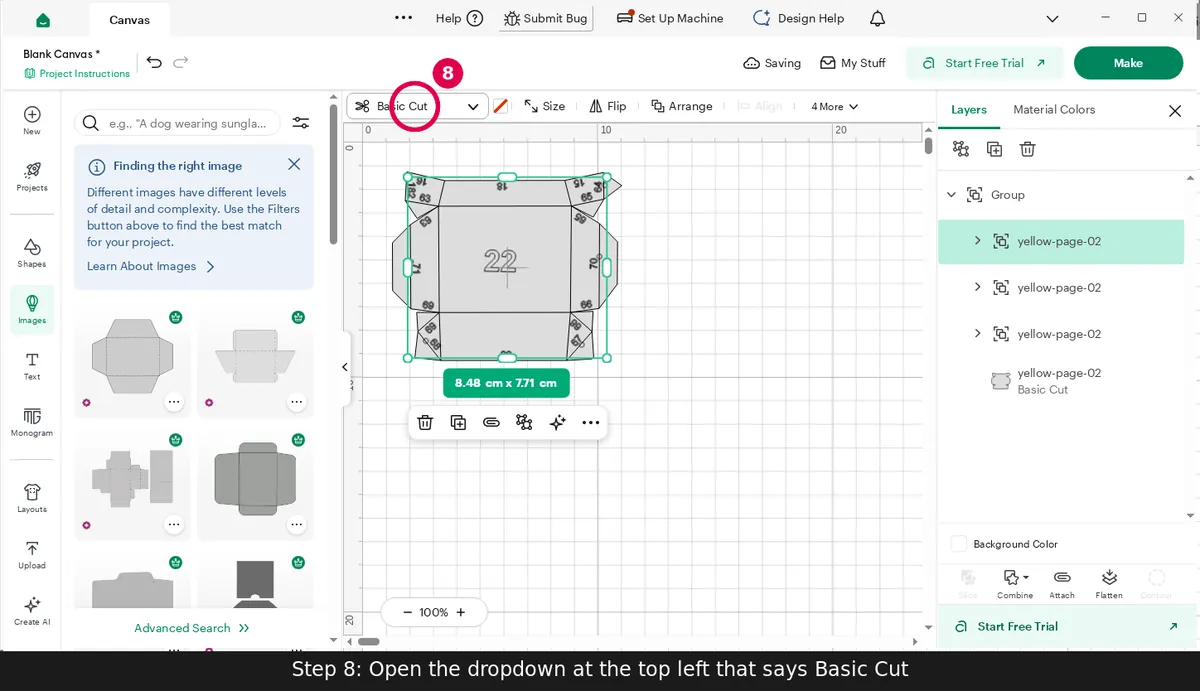
Open the dropdown at the top left that says Basic Cut 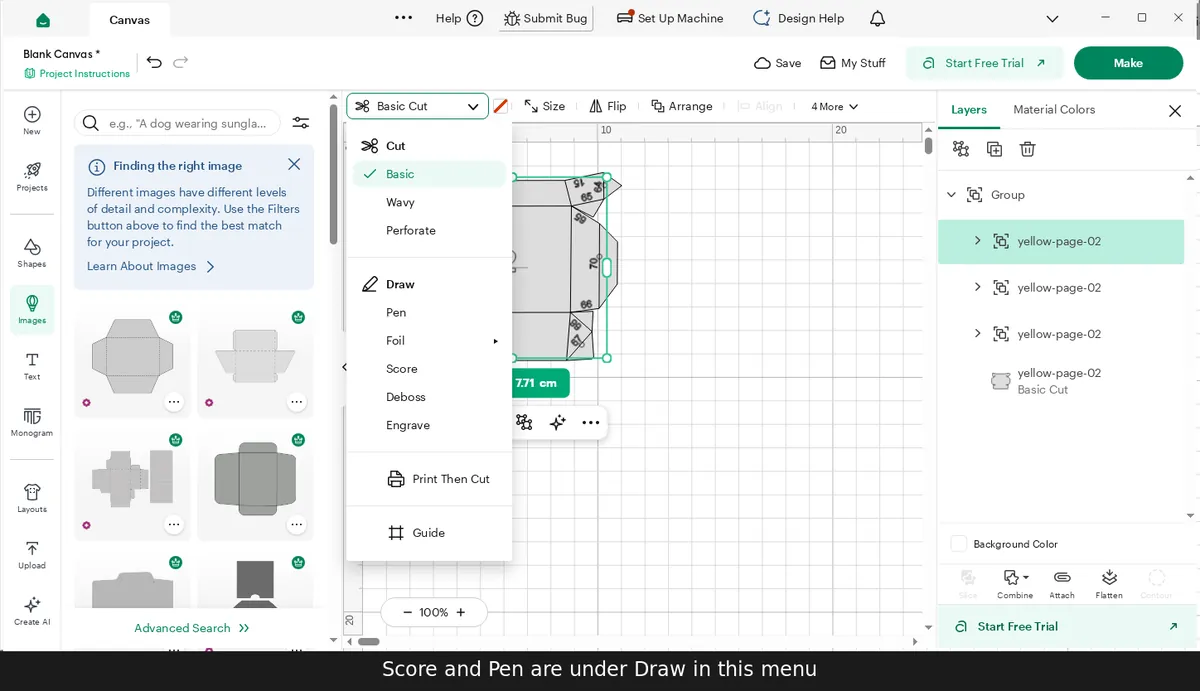
Score and Pen are under Draw in this menu 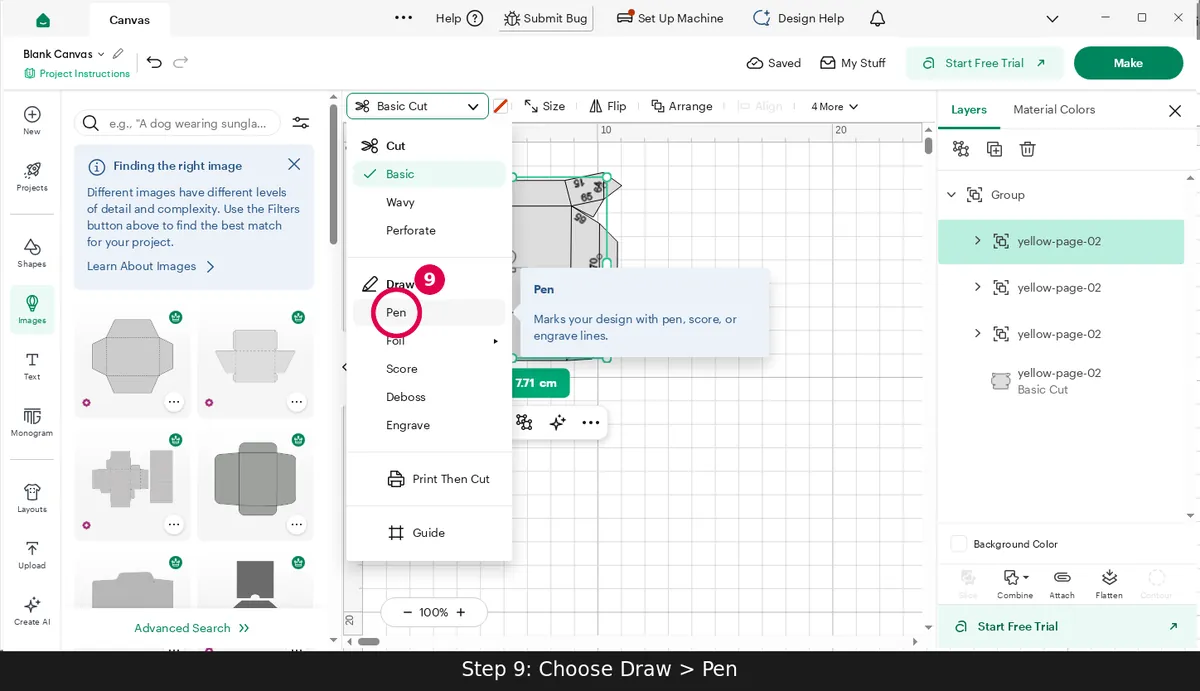
Choose Draw > Pen 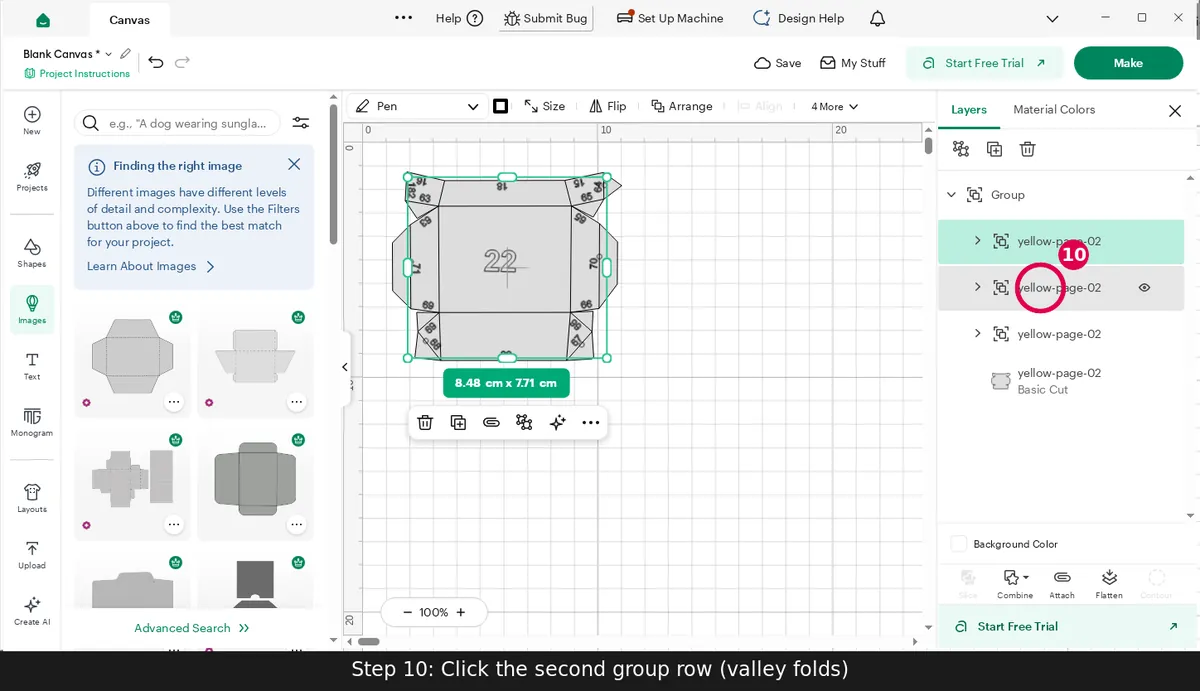
Click the second group row (valley folds) 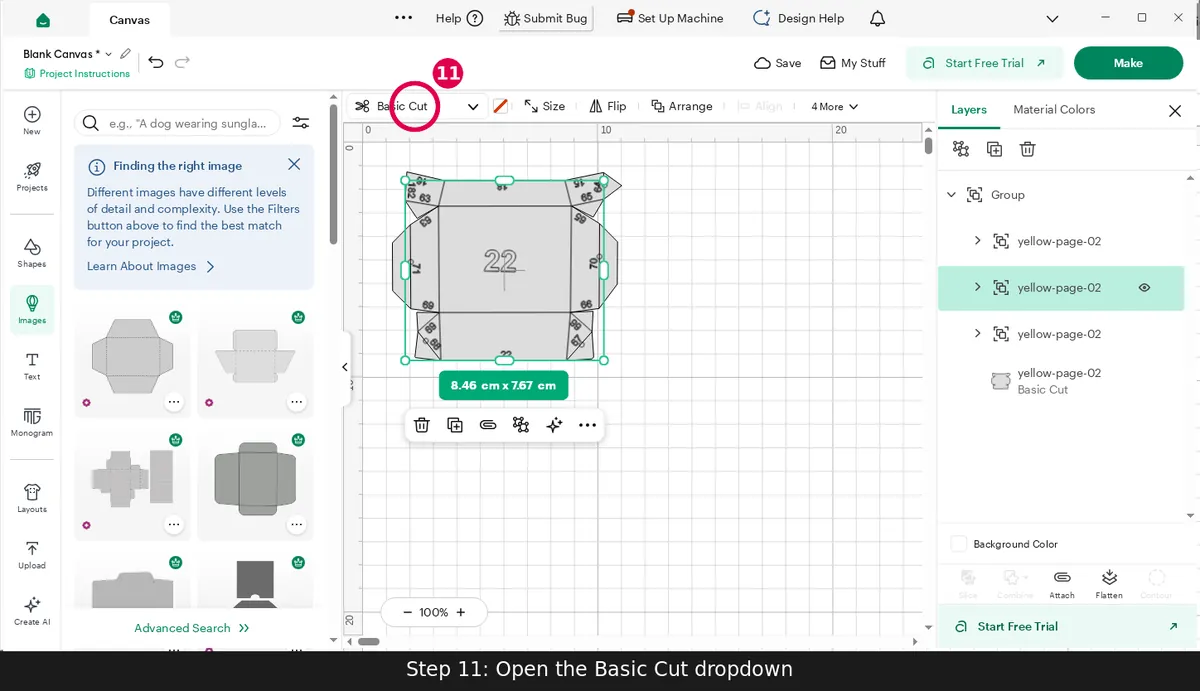
Open the Basic Cut dropdown 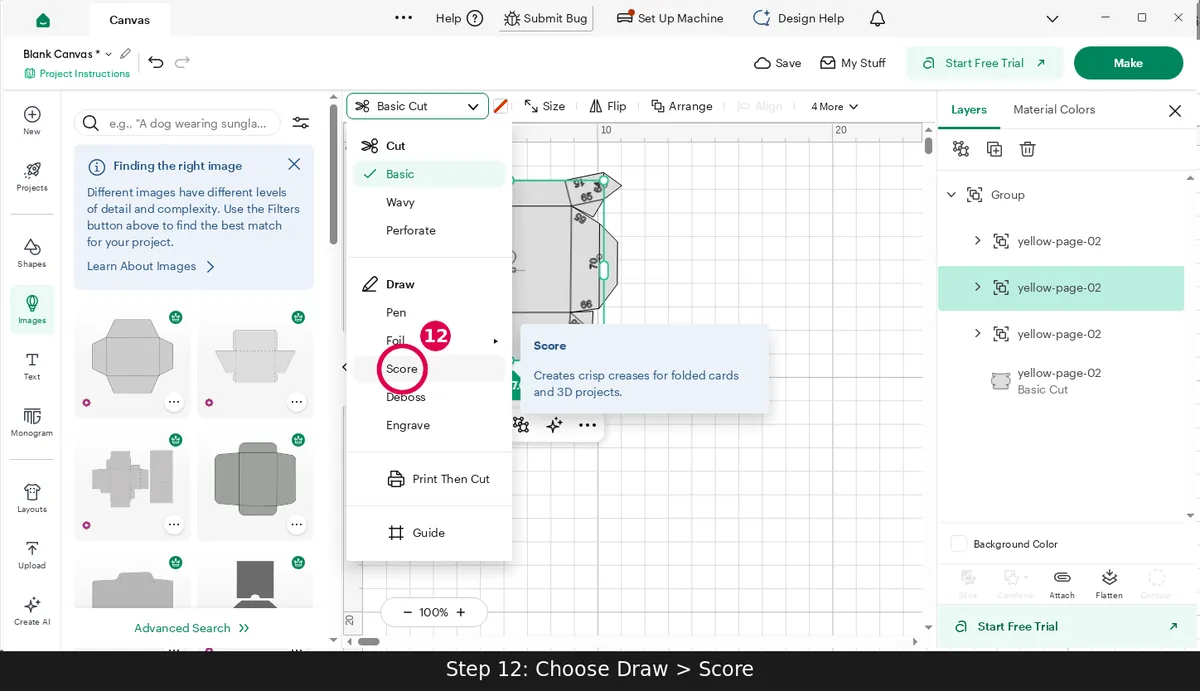
Choose Draw > Score 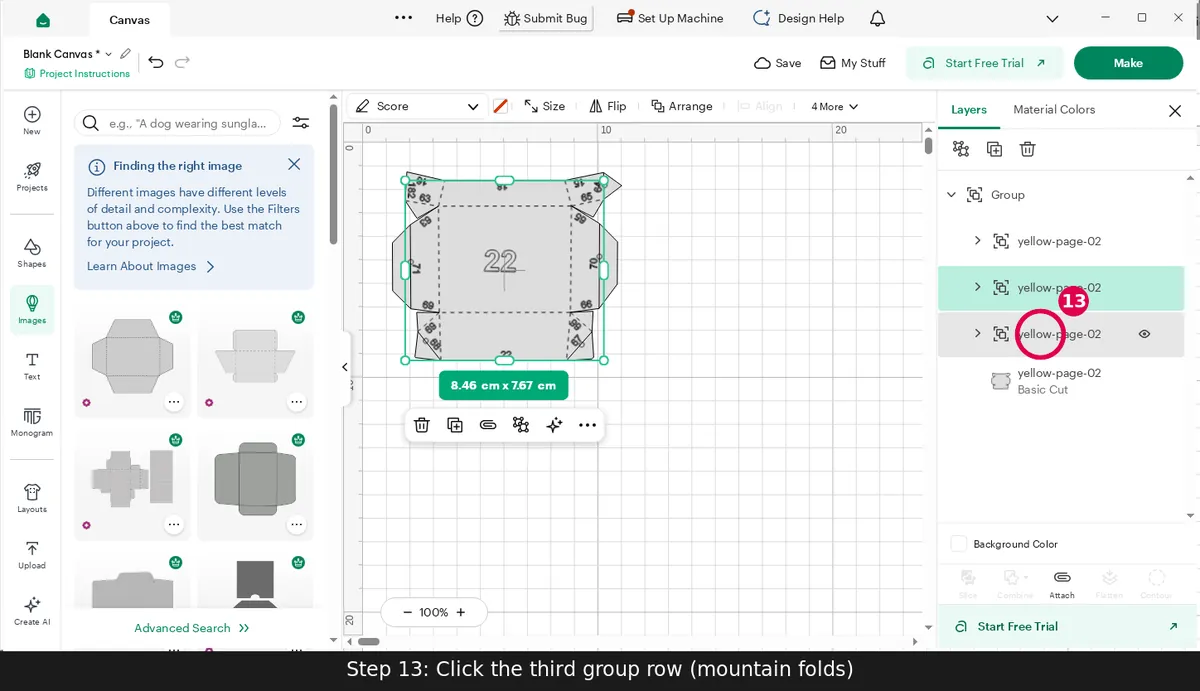
Click the third group row (mountain folds) 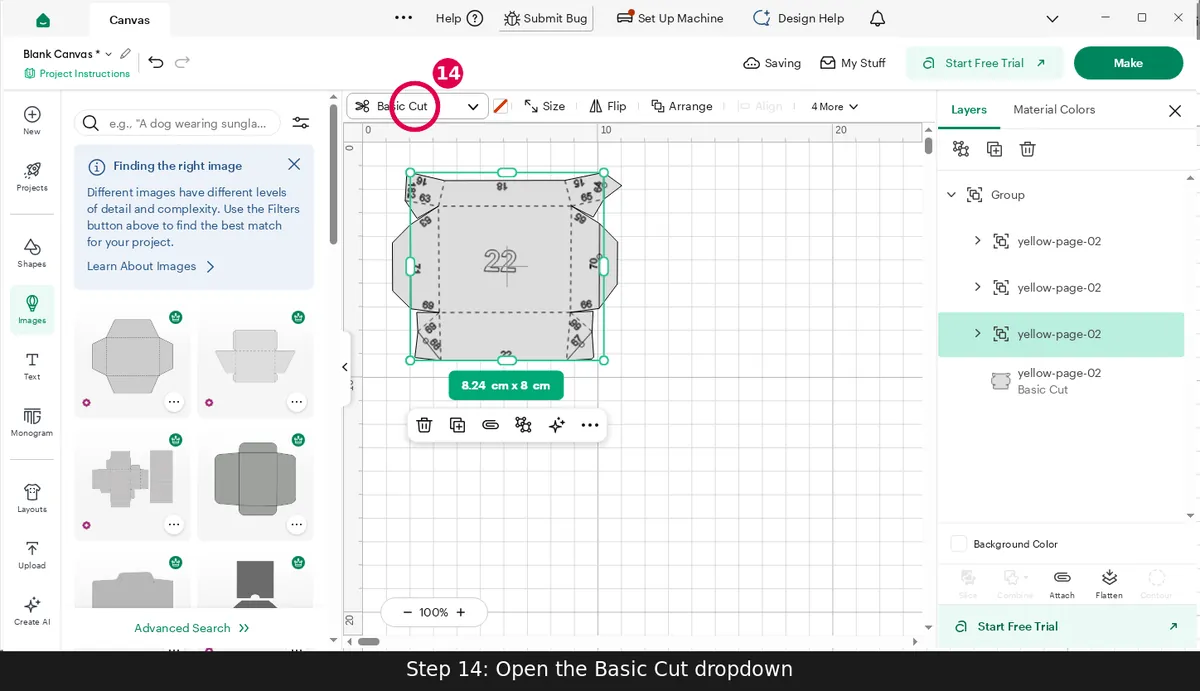
Open the Basic Cut dropdown 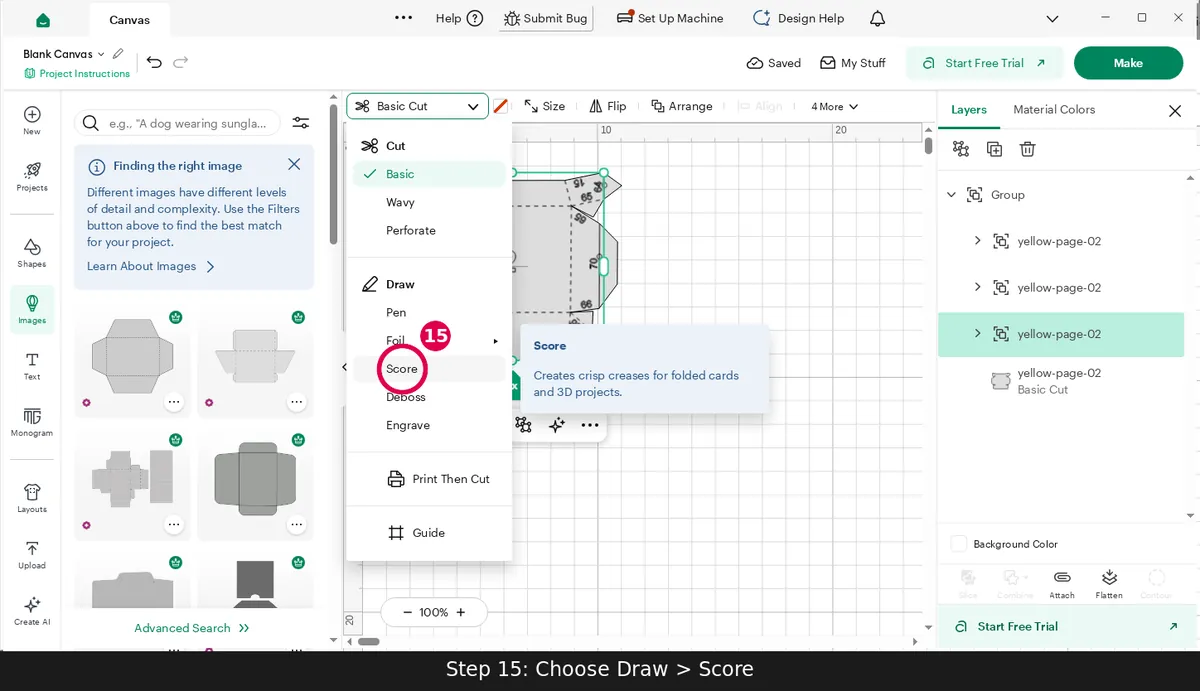
Choose Draw > Score 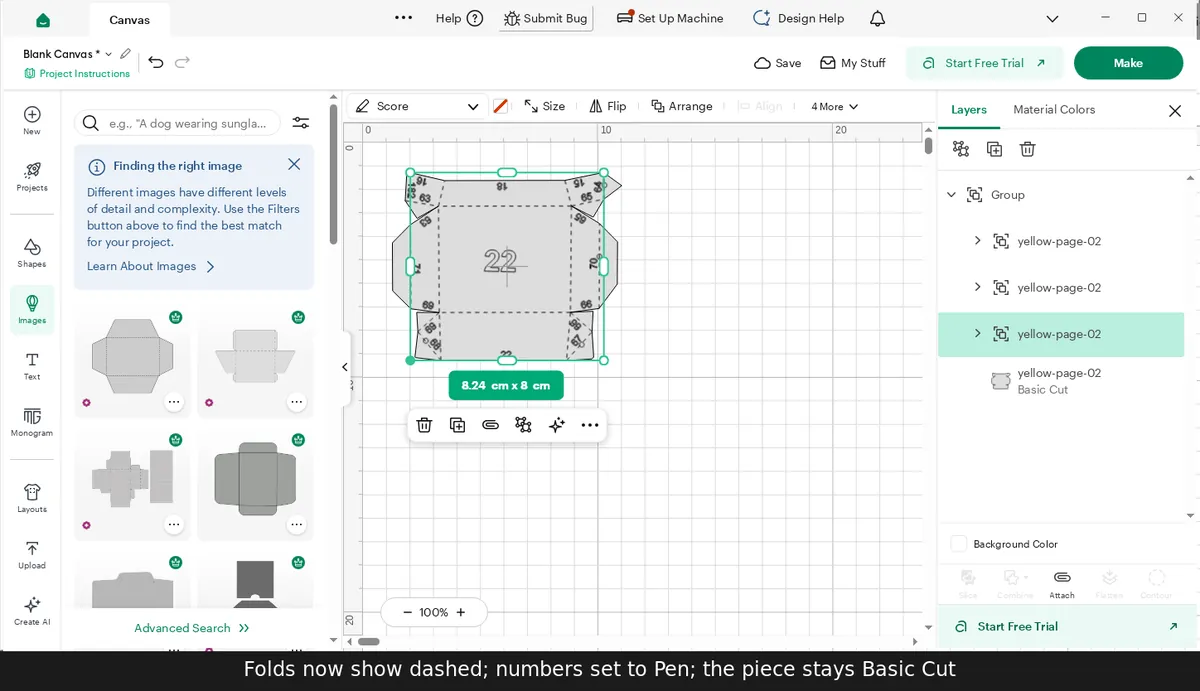
Folds now show dashed; numbers set to Pen; the piece stays Basic Cut 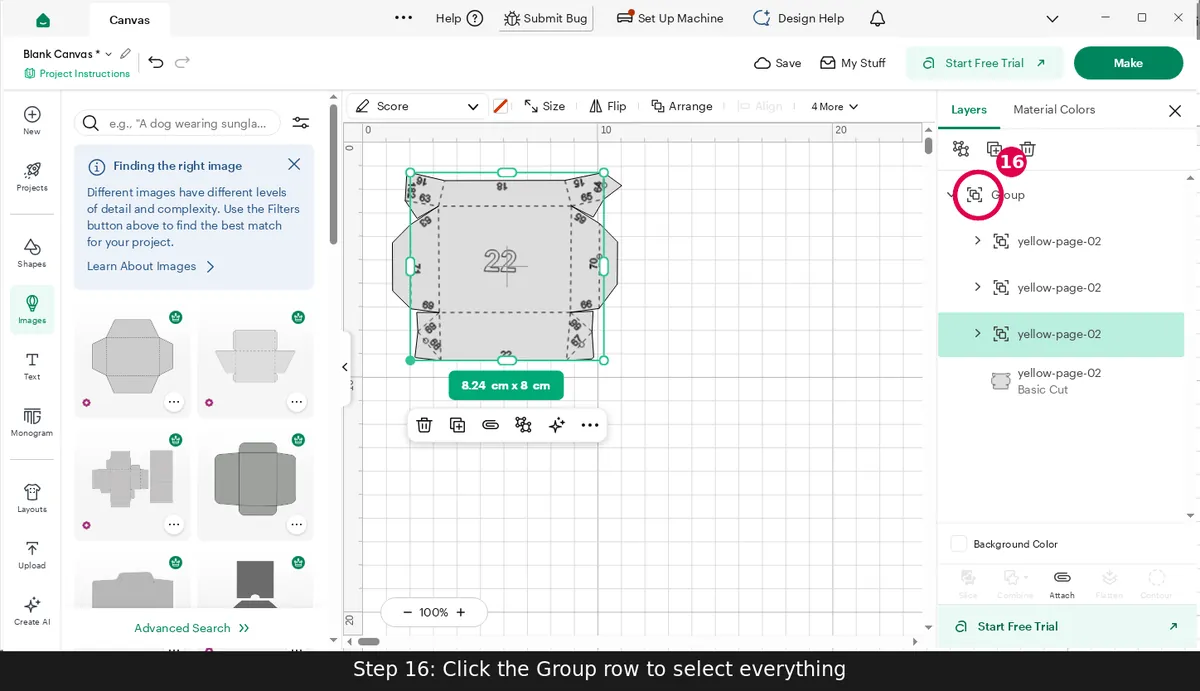
Click the Group row to select everything 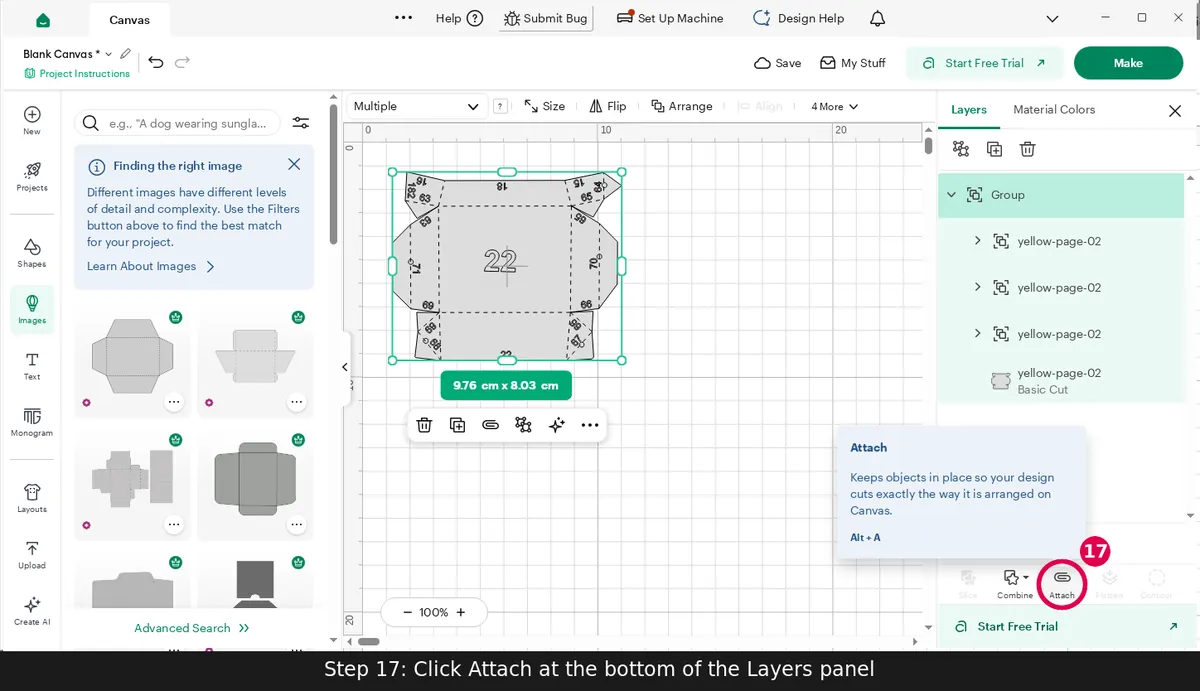
Click Attach at the bottom of the Layers panel 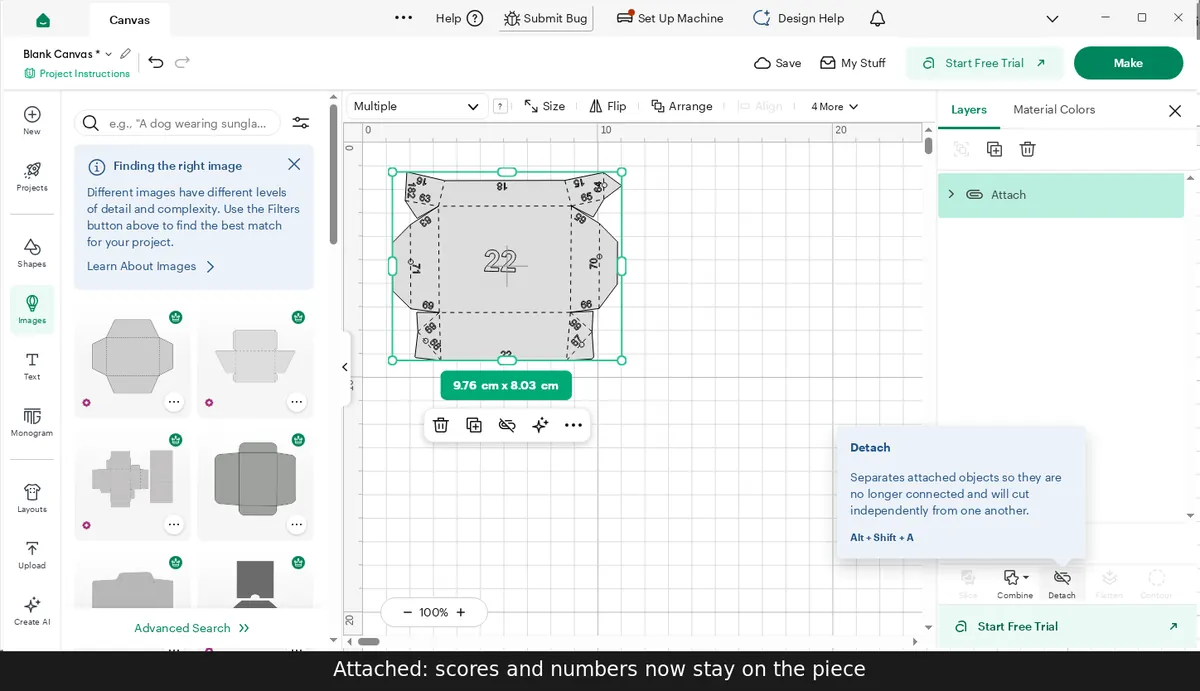
Attached: scores and numbers now stay on the piece 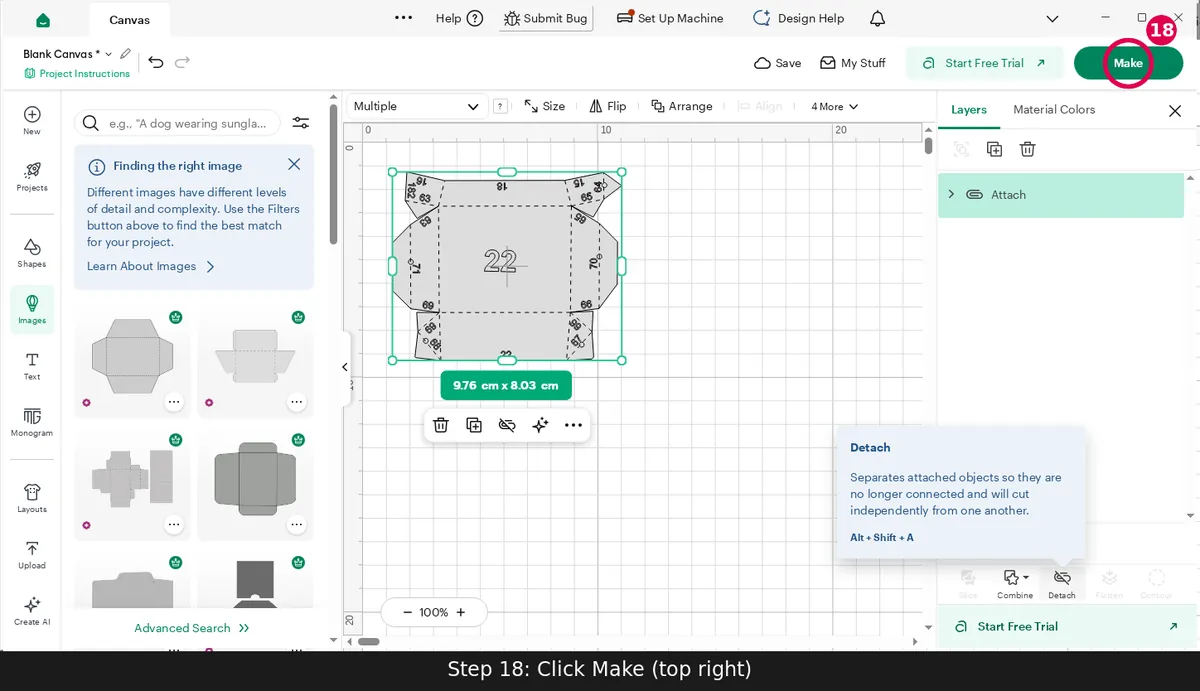
Click Make (top right) 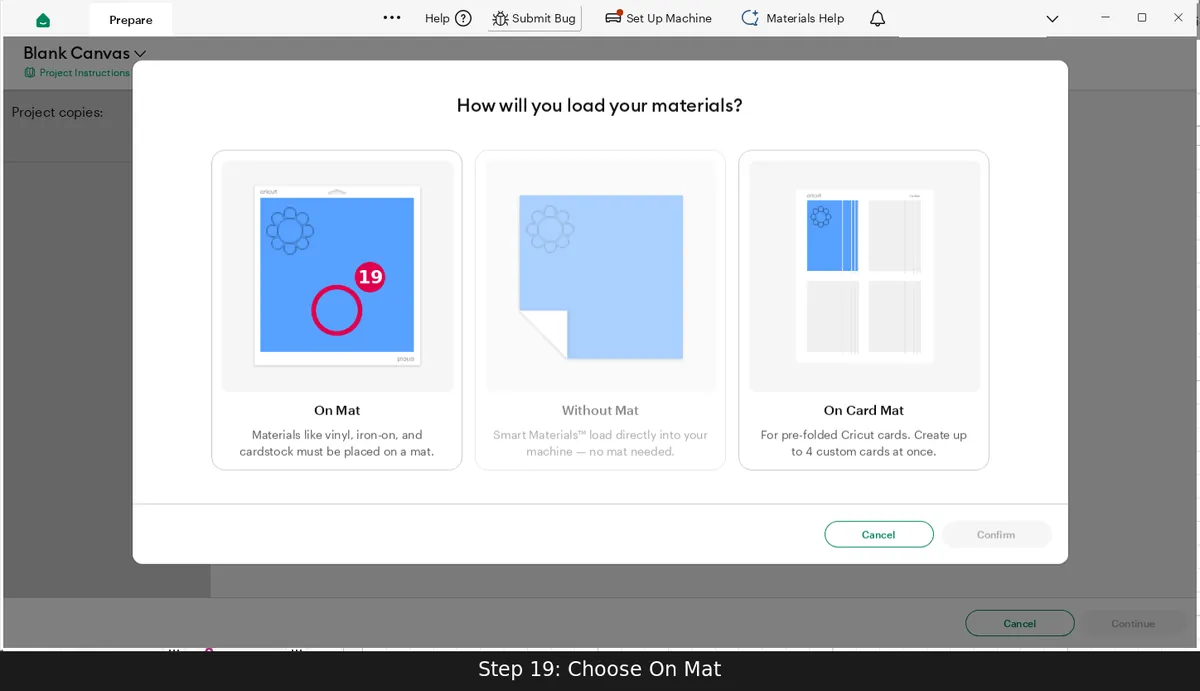
Choose On Mat 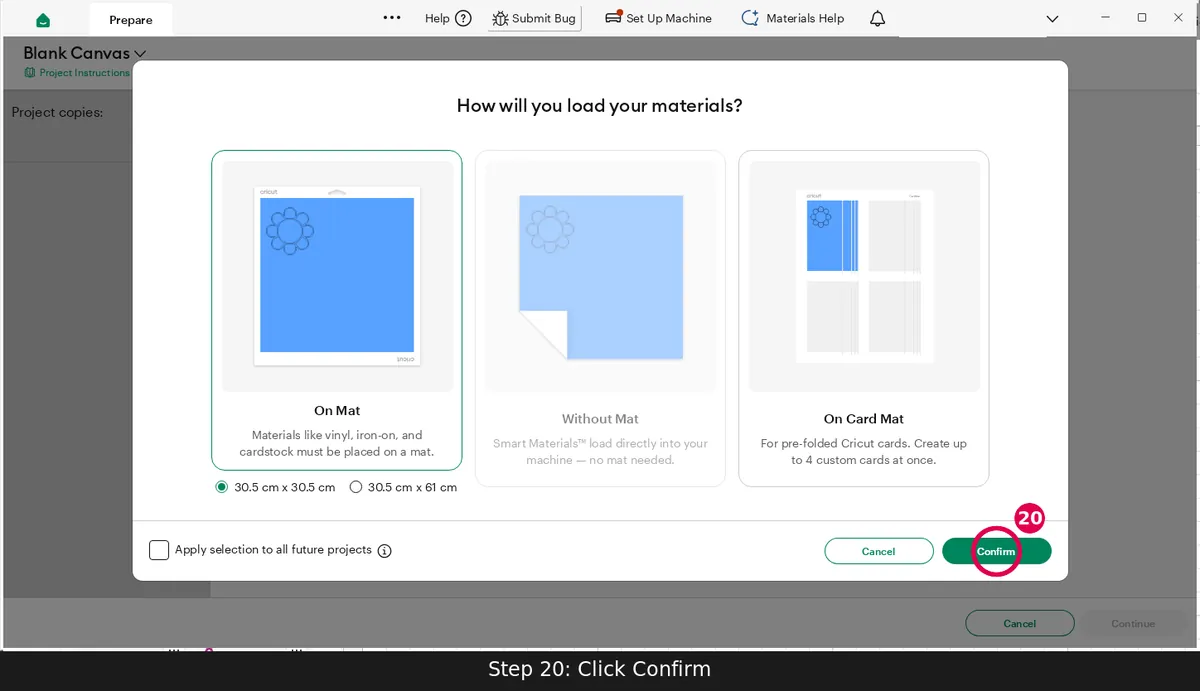
Click Confirm 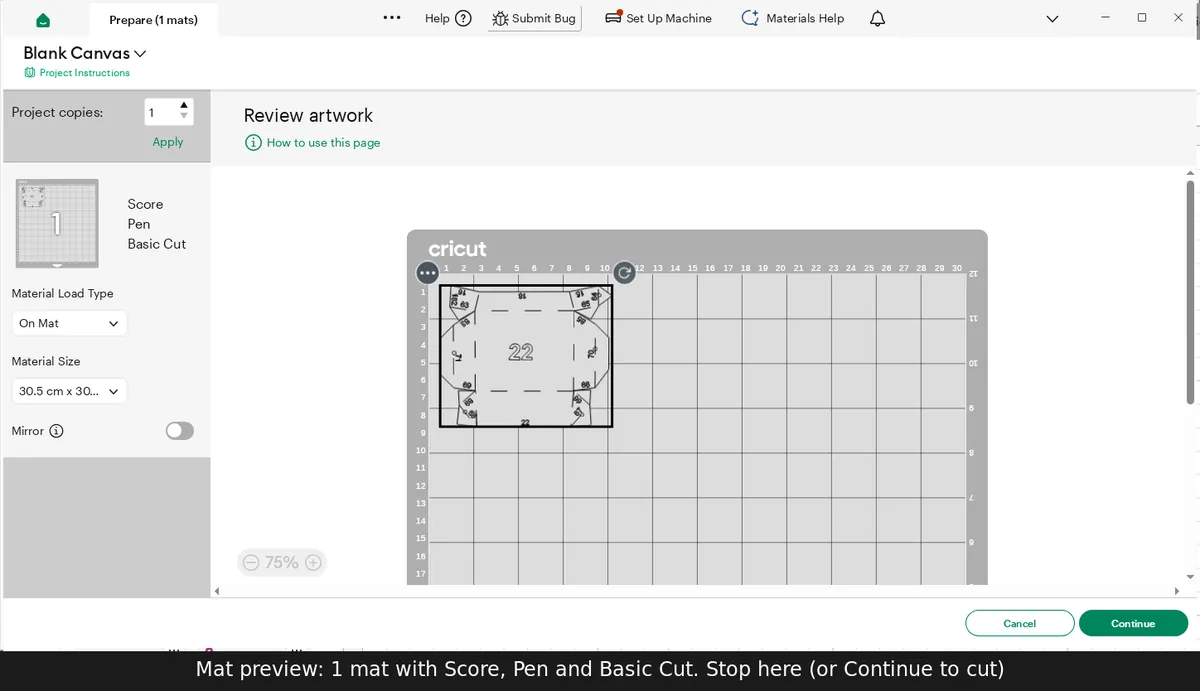
Mat preview: 1 mat with Score, Pen and Basic Cut. Stop here (or Continue to cut)
Frequently asked
- Can my Cricut score fold lines?
- Yes, with a scoring stylus or scoring wheel. Every fold line comes in its own score layer. In Cricut Design Space set that layer to Draw, then Score (the dropdown that says Basic Cut) and Attach it to the cut lines, so the machine scores the folds where they belong instead of cutting along them.
- What's the difference between mountain and valley folds?
- A mountain fold bends away from you into a peak; a valley fold bends towards you into a dip. Templates usually draw valley folds as dashed lines and mountain folds as dash-dot lines. From a PDF template we keep them apart if you like: mountain folds red, valley folds blue, each in its own score layer.
- Can I use a picture instead of a PDF?
- Yes. Upload a JPEG, PNG or WebP picture of the template. The dark outline lines are cut, openings and slits inside the pieces are cut too, dashed lines are scored and printed colour is left alone. A picture can't show which way a fold goes, so all its folds go in one score layer, and pen numbers come only from PDFs.
- Does it keep the exact size?
- Yes. Pieces from a PDF template keep the exact size they are drawn at. The SVG is sized in inches, the way Design Space reads it, and the DXF opens at the same size in Silhouette Studio and Brother CanvasWorkspace. Pictures are sized as 300 DPI scans, so a phone photo of a printed sheet may not come out at its true size.
- How much does it cost?
- Uploading and previewing are free. Downloading a template costs 5 credits, taken from your free monthly credits first (a free account gets 25 credits every month). After that every page, fold option and file type of the same template is free, and leaving pieces out doesn't change the price.
- Can I use any template I find online?
- Only upload templates you own or have permission to use: your own designs, or templates whose licence lets you cut them. QuietBookCut is a tool for making your own projects, not for copying someone else's work.